Senin, 31 Agustus 2015

Cara Install Net Framework 35 Offline Windows 10

Cara Install .NET Framework 3.5 di Windows 10

Cara Install .NET Framework 3.5 di Windows 10

.NET Framework adalah kumpulan system library yang dibutuhkan beberapa aplikasi Windows. Tanpa adanya .NET Framework, aplikasi di Windows tidak bisa dijalankan dan akan menyebabkan error. 
Pada Windows 8 & Windows 10, Microsoft tidak menginstall secara langsung .NET Framework 3.5. Sebenarnya, .NET Framework 3.5 sudah ada didalam file ISO Windows 10 yang kalian gunakan untuk install, tinggal kalian install saja lewat file ISO tersebut. Kalian bisa lihat caranya dibawah ini.

Sebelum mulai menginstall, kalian pastikan memiliki persyaratan dibawah :

- File ISO Windows 10 yang kalian gunakan untuk install, pastikan kalian menggunakan file ISO yang sama dengan Build Number yang sama & Arsitektur bit yang sama ( maksudnya jangan gunakan file ISO Windows 10 x86  untuk menginstall .NET Framework 3.5 di Windows 10 64-bit ! ).

- Sangat disarankan untuk menginstall .NET Framework 3.5 di Windows 10 dalam keadaan masih fresh install. Artinya, Windows 10 tersebut belum diinstall update sama sekali.

Cara Install .NET Framework 3.5 di Windows 10

1. Mount file ISO Windows 10 dengan Daemon Tools atau masukkan DVD file ISO Windows 10 kedalam PC kalian. 
Cara Install .NET Framework 3.5 di Windows 10
2. Buka Command Prompt dan jalankan sebagai Administrator, setelah itu pada CMD kalian ketik perintah dibawah ini :
Dism /online /enable-feature /featurename:NetFX3 /All /Source:D:\sources\sxs /LimitAccess
Perhatikan drive letter D yang saya beri warna merah, drive letter tersebut menunjukan lokasi tempat disk drive kalian ( DVD-ROM atau Virtual DVD-ROM ). Driver Letter bisa berbeda-beda, jadi kalian sesuaikan saja.
 Cara Install .NET Framework 3.5 di Windows 10
3. Jika sudah selesai maka akan muncul pesan dibawah ini. 
Cara Install .NET Framework 3.5 di Windows 10
4. Bagaimana ? Mudah bukan install .NET Framework 3.5 Offline di Windows 10 ? sekarang kalian bisa menjalankan aplikasi yang membutuhkan .NET Framework 3.5 :)
 
source: http://www.software182.com/2015/07/cara-install-net-framework-35-di-windows-10.html#axzz3sa1FOCPR

Kamis, 20 Agustus 2015

Cara Mencari Mac Address dan Ip Address di Cisco

Cara Mencari Mac Address dan Ip Address di Cisco

Catatan:
  • Komputer client yang akan di trace harus dalam keadaan hidup dan terhubung ke jaringan
  • Menggunakan switch yang manageable.
Pertama, cara mencari mac address:
#show arp
Protocol Address Age (min) Hardware Addr Type Interface
Internet 10.32.16.58 38 001e.8cda.a615 ARPA Vlan16
Internet 10.32.10.32 90 0024.2188.1aec ARPA Vlan10
Internet 10.32.11.33 89 0022.6849.736a ARPA Vlan10
Internet 10.32.14.36 88 0022.684b.3589 ARPA Vlan14
Internet 10.3.1.8 0 0015.5d86.7d34 ARPA Vlan4
#show mac address-table
Mac Address Table
——————————————-
Vlan Mac Address Type Ports
—- ———– ——– —–
All 0100.0ccc.cccc STATIC CPU
All 0100.0ccc.cccd STATIC CPU
All 0180.c200.0000 STATIC CPU
All 0180.c200.0001 STATIC CPU
10 0026.0a6a.1dc1 DYNAMIC Gi1/0/1
10 c89c.dc2b.ff45 DYNAMIC Gi1/0/7
12 0002.f155.48b3 DYNAMIC Gi2/0/23
12 0025.468f.1089 DYNAMIC Gi1/0/11
12 0025.468f.10c1 DYNAMIC Gi1/0/11
12 4419.b634.2dcf DYNAMIC Gi2/0/23
#sho mac address-table address 0025.843f.a088
Mac Address Table
——————————————-
Vlan Mac Address Type Ports
—- ———– ——– —–
121 0025.843f.a088 DYNAMIC Gi0/9
# show mac address-table vlan 121
Mac Address Table
——————————————-
Vlan Mac Address Type Ports
—- ———– ——– —–
121 0025.843f.a088 DYNAMIC Gi0/9
Cara mencari IP dengan mac address dan sebaliknya:
#show ip arp 0024.2182.2914
Protocol Address Age (min) Hardware Addr Type Interface
Internet 10.32.17.31 30 0024.2182.2914 ARPA Vlan16
#show ip arp 10.32.17.31
Protocol Address Age (min) Hardware Addr Type Interface
Internet 10.32.17.31 31 0024.2182.2914 ARPA Vlan16


source : https://ruswandar.wordpress.com/2015/05/07/cara-mencari-mac-address-dan-ip-address-di-cisco/

Kamis, 13 Agustus 2015

How to unlock Active Directory User Accounts

How to unlock Active Directory User Accounts


On this page you learn how to unlock Active Directory user accounts which was locked by the intruder account detection. In the admin utility 'AD Users and Computers' a locked user can be identified only by opening the 'Account' tab of the regarding user account:


AUC: Locked User Account

An intruder account lockout is triggered by the system if and only if the number of failed logon attempts outranges the threshold which was set in the regarding group policies. In Windows 2000 - 2008 environments, you can set these thresholds in the Account Policies of the Default Domain Policy:


Account Lockout Policy

A lock can only triggered by the system itself - please don't mix this up with the normal disable/enable operation for user accounts. You can search in the directory for locked accounts. As this is quite complicated, there is a dedicated article in the SelfADSI tutorial: 'Searching for locked accounts'.


The msDS-User-Account-Control-Computed attribute


To unlock a locked account isn't trivial either. Although there is the attribute msDS-User-Account-Control-Computed since Windows 2003, which shows as a bit field in it's flag UF_LOCKOUT (16) a locked account directly, it is an constructed attribute. Therefore you cannot use this attribute in LDAP filters for a search operation - and you cannot write this attribute to release the lock. All you can do with msDs-User-Account-Control is evaluating the lock status for a single user if you are reading the user attributes.


Unlock with the attribute lockoutTime


The easiest unlock method is based on the lockoutTime attribute and works for all Active Directory versions since Windows 2000: The attribute lockoutTime holds the date and time of the account lock event - but the value is stored in the complex format of a Microsoft DateTime Interval timestamp (64-Bit Long 'Integer8': 100-nanosecond steps since 01/01/1600). Fortunately, we don't have to calculate a certain value in order to unlock the regarding account: It's enough to write a Null value into the lockoutTime attribute:
Set user = GetObject("LDAP://cn=sandra,ou=user,dc=cerrotorre,dc=de") user.lockoutTime = 0 user.SetInfo

Unlock with IsAccountLocked


The more circumstantial approach....

According to unlocking an account which was locked by the intruder detection, often the following (more complicated) technique is cited: You connect to the regarding user object not with the normal LDAP ADSI Provider, but with the 'old' WINNT provider interface which was originally designed for the management of Windows NT domain objects. Here you have a special API Object Property called IsAccountLocked. In fact this property can only be used as a read/write value only if you connect to the object with the WINNT provider. The normal LDAP provider cannot write to this property:
Set user = GetObject("WinNT://CERROTORRE/Sandra) 'Syntax=> WinNT://Domäne/Benutzer user.IsAccountLocked = FALSE user.SetInfo
 
Source : http://www.selfadsi.org/extended-ad/user-unlock.htm

Unable To Disable Windows Proxy Setting

Unable To Disable Windows Proxy Setting

BrowserProxyWe had a system come in recently that had been heavily infected by the ZBot rootkit and a variety of Trojans. MS Security Essentials had cleaned some things off, but the system still had a lot of junk on it. The main problem, however, was the computer could not access the Internet. Many virus infections create proxy servers and then set Windows to route all web traffic through the virus proxy. When most anti-virus programs kill off a virus like this, they don’t clear the proxy setting. So you have no virus, but you also can’t access the Internet. This is understandable since messing with that proxy setting is dicey in a corporate environment where they get used heavily.
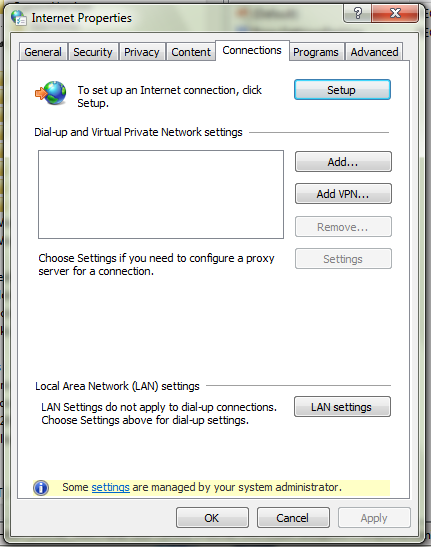
Easy enough – click Start -> Control Panel -> Internet Options -> Connections -> LAN Settings and uncheck the ‘Use proxy’ checkbox.
Still can’t access the Internet due to a Proxy error. What?
Go back to the Proxy setting and it’s checked. So I uncheck it and save. Open screen up? Still checked. I check for any rogue processes running that might be setting it as soon as I unset it. Nope. Now what?

Then I notice a yellow bar in Internet Options: ProxySettingsThis user account had Admin rights, so that seemed strange. After some Google research, I came across some others who had the same issue and the techs at Bleeping Computer had given him some keys to remove – but none seemed to have any effect. Then I found this article dealing with the same problem:
With Internet Explorer 6.0 troubleshooting zones could be problematic if the administrator you are working with forgets to inform you that they have implemented “Security Zones: Use only machine settings” via GPO or a direct registry change.
Location: HKEY_LOCAL_MACHINE\Software\Policies\Microsoft\Windows\
CurrentVersion\Internet Settings
Name: Security_HKLM_only
Type: REG_DWORD
Value: 1 <-Enabled 0 <-Disabled
By default the value is not present and thus is disabled by default. With Internet Explorer 7.0 the UI has been updated to reflect the presences of Security_HKLM_only and if the feature is ENABLED. The visual notification is a big win for IE7 troubleshooting. Note the yellow bar at the bottom of the dialog. “Some settings are managed by your system administrator”. This is your clue that you are dealing with Security_HKLM_only. The bonus is you can not make modifications to any of the zones, note the Custom level, Default level, and the Reset all zones to default level are grayed out.
Well, this computer I had was Windows 7 with IE 11, but I dove into the registry anyway. No luck. However, I did notice the following key:
HKEY_LOCAL_MACHINE\Software\Policies\Microsoft\Windows\
CurrentVersion\Internet Settings -> ProxySettingsPerUser
And it was set to 0 (Disabled). I set it to 1 and the problem went away. The yellow warning bar disappeared and I could adjust the proxy setting and make it stick. Given how many viruses create proxy servers, I’m surprised I haven’t seen this before…

Source: http://fixedit.itxpress.biz/2014/10/08/unable-to-disable-windows-proxy-setting/